INSTRUCTIONS
Thank You for choosing Hervor.
Our products have been intuitively designed to fit you and your outfit. To get the most out of our products, please ensure you follow our instructions below. For care and cleaning refer to our 'Care' manual to prolong the life of your watch and straps.
For battery changes, please take your watch to a local watch repairer.
CHANGING YOUR STRAPS

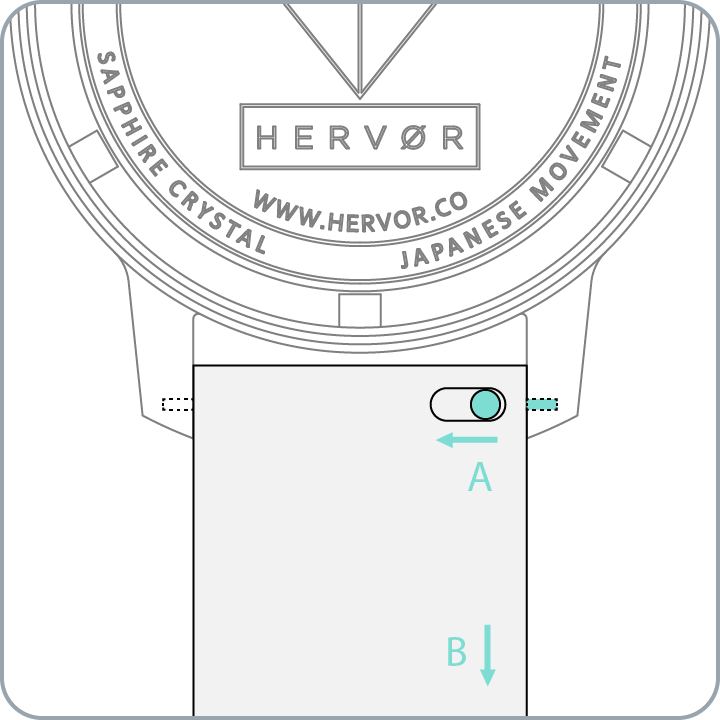
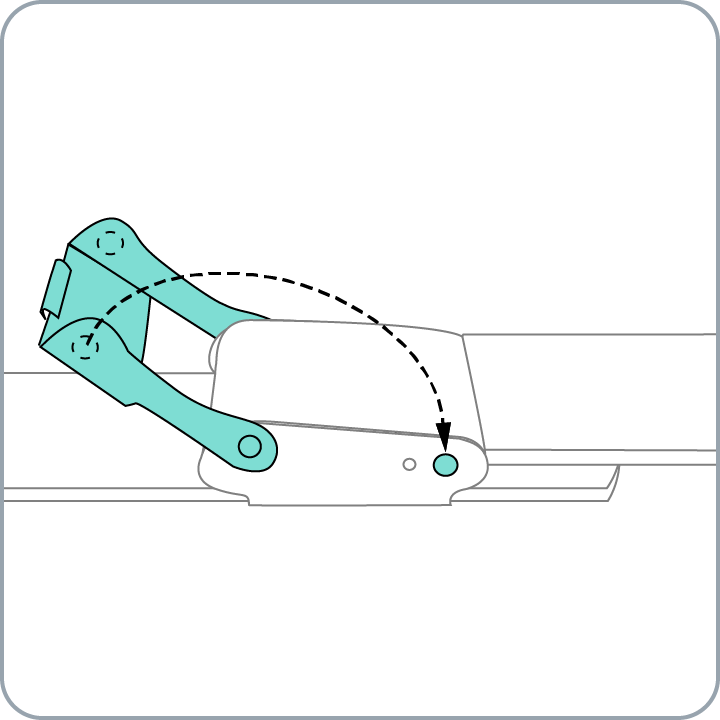
1. SLIDE LEVER TO RELEASE STRAP
Our straps are installed using an innovative spring bar mechanism with an accessible lever so you can quickly and easily change your look without the use of tools.
Flip your watch over to reveal the strap's lever. (A) Using your fingernail, slide the lever away form the watch's lug to release the strap from the watch and (B) gently pull the strap out of its place. Repeat this step on the other strap.

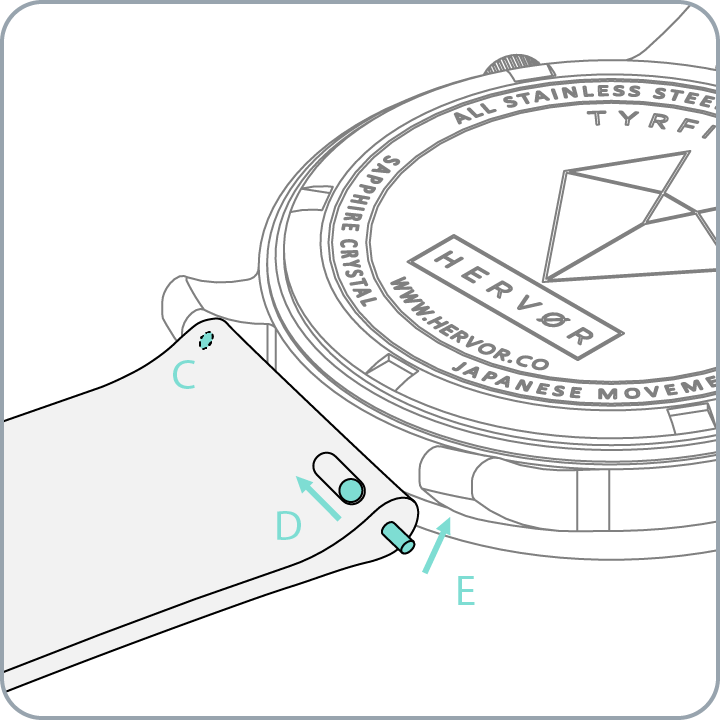
2. POSITION ALTERNATIVE STRAP IN PLACE
With your alternative strap in hand, (C) position the pin that is opposite to the lever into the relevant hole on the watch's lug.
Once in place, (D) slide the lever to the centre of the strap and (E) align the remaining pin to the hole in the lug.
TIP: The shorter strap should go on the top lugs of the watch. The longer strap goes on the bottom end.

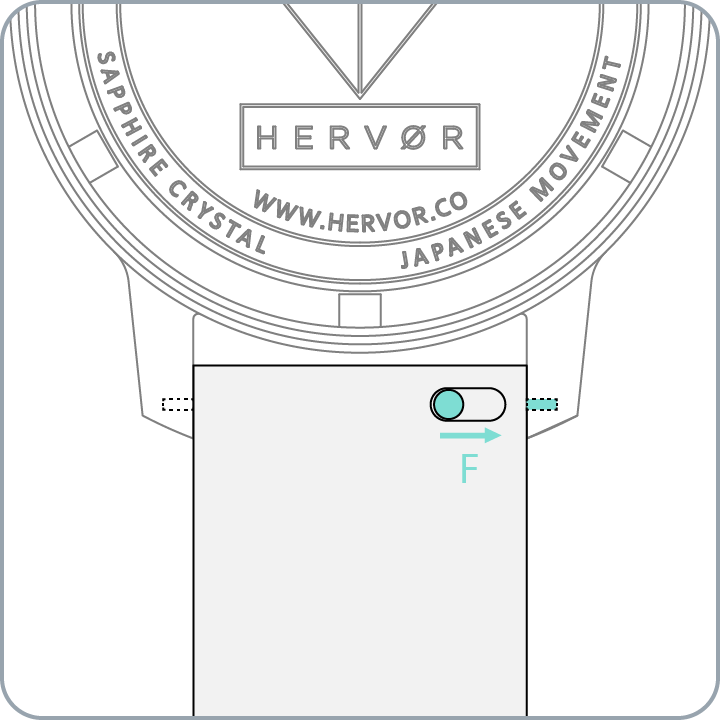
3. RELEASE LEVER TO SECURE
(F) Release the lever to secure the strap into the lugs.
You may need to wriggle the strap until the pin falls into place. When it does, you should hear a 'clicking' sound.
Repeat Steps 2 & 3 for the other strap.
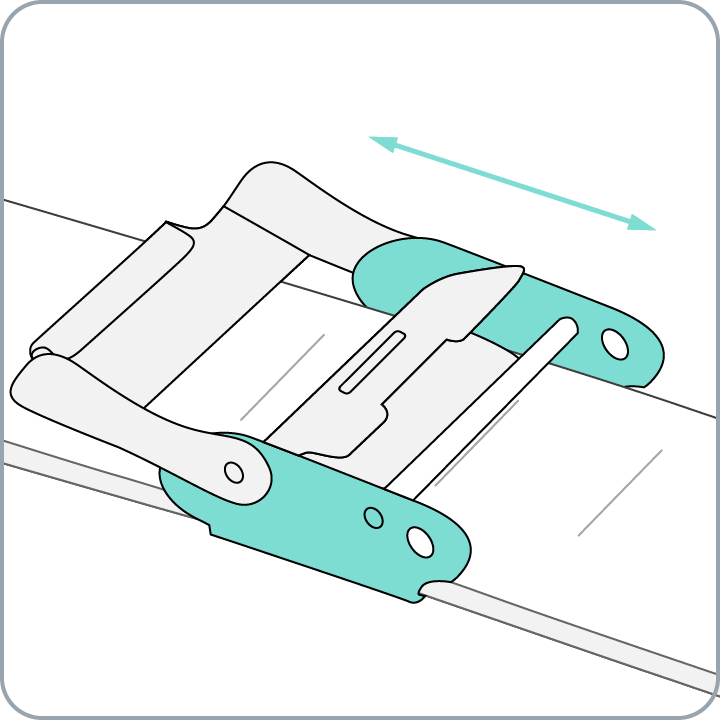
ADJUSTING THE LENGTH OF THE METALLIC MESH BAND

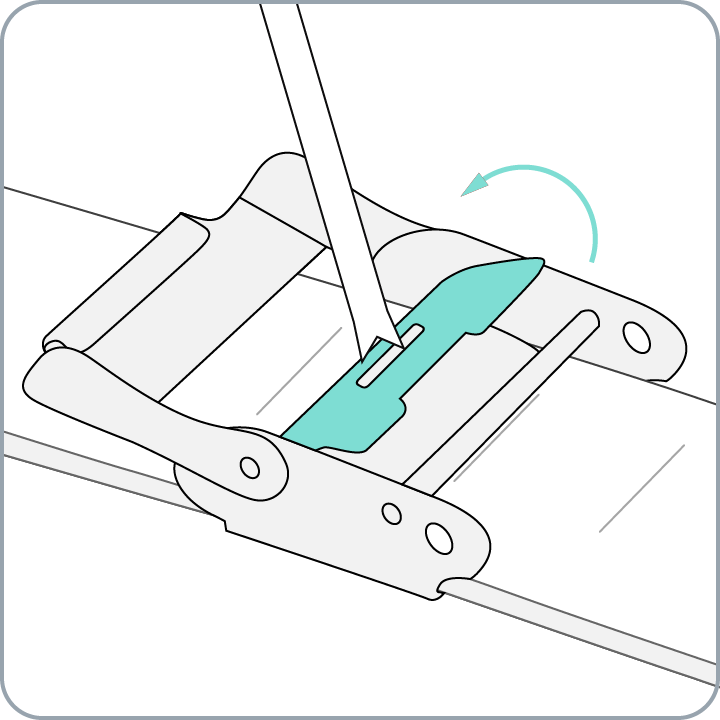
1. LIFT BAR
Position the adjustment tool or flathead screwdriver into the slot of the clasp as shown. Lift the bar towards the watch and away from the straight pin to unlock the clasp. It may feel tight on a brand new watch, just continue to apply force gently until it unlocks the clasp.
IMPORTANT: Ensure that the adjustment tool's handle points towards the watch and that the bar is lifted from the slot. If it is levered against the straight pin it may bend or destroy the pin.

2. SLIDE CLASP
Slide the clasp to the desired position for your wrist size. The clasp must be placed in one of the adjustment indentations on the back of the band for gauranteed security.

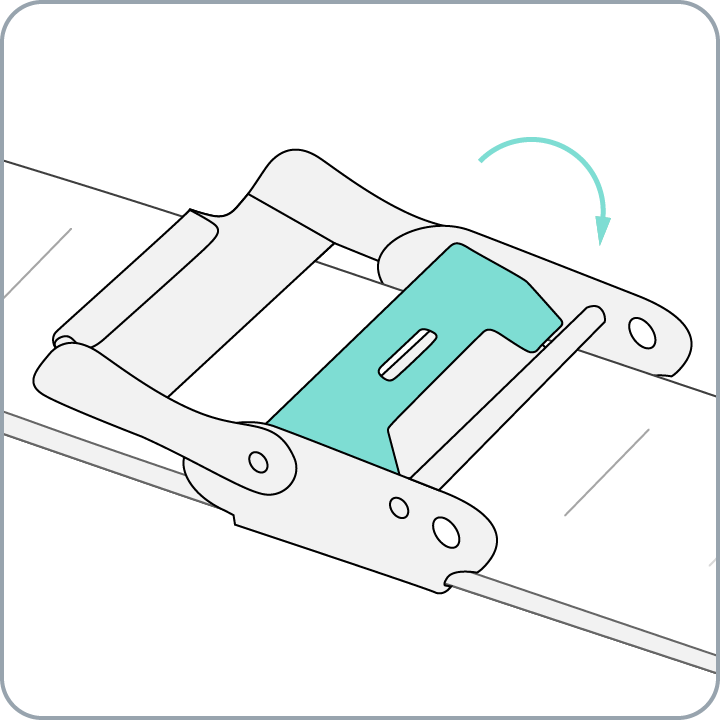
3. PRESS BAR
Press the bar back into its locked position with your fingers. If it is too tight, use the supplied adjustment tool to secure it in place by reversing Step 1.
WARNING: Do not use force with the tool to secure the bar into place. This may damage the clasp. Gently use the tool to provide minimal leverage to close the bar.
SECURING THE METALLIC MESH CLASP

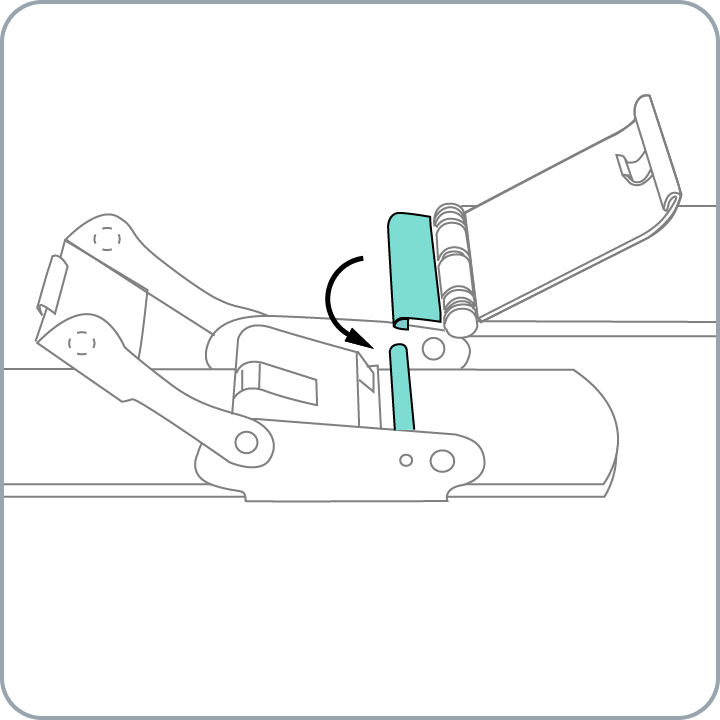
1. PULL THE HOOK OVER THE PIN

2. SNAP THE FLAT CLASP CLOSED

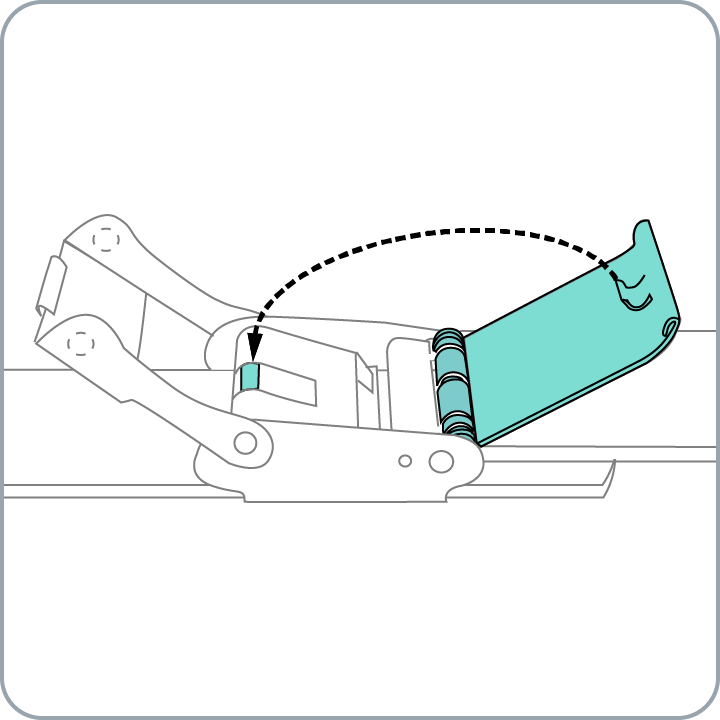
3. CLOSE THE SECURITY CLASP
To unlock, do the opposite to these steps in reverse (Step 3, 2, 1)
ADJUSTING THE TIME

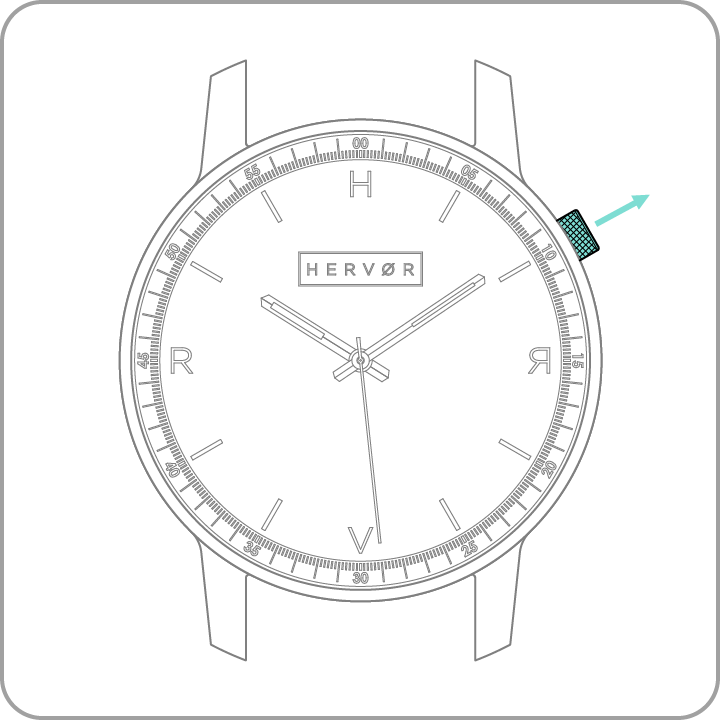
1. PULL CROWN OUT
Pull the crown away from the watch casing until you experience a click.
The time on the watch should be standing still - ensure that the second hand is no longer ticking.
On a new watch, you will find a white plastic spacer to save the clock from using its battery whilst in its packaging. Remove this plastic spacer prior to setting the time.

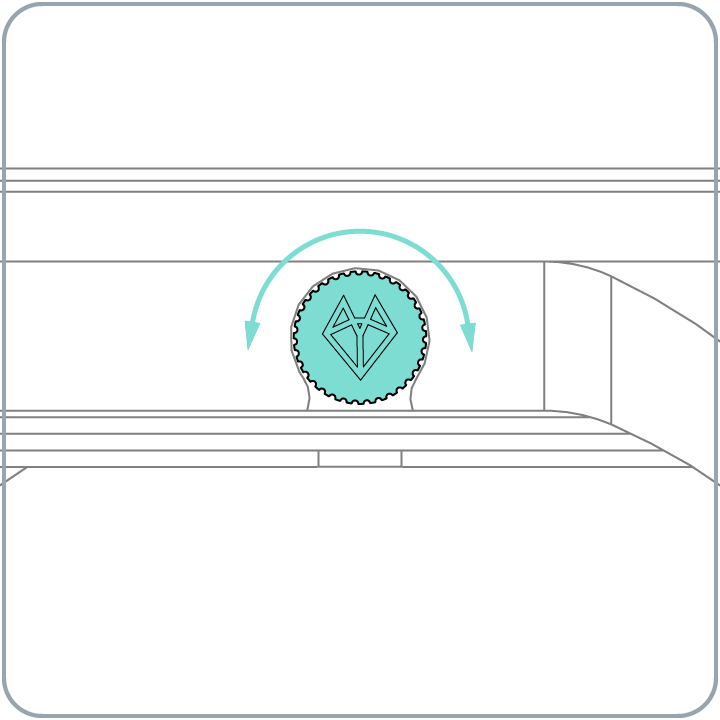
2. TURN THE CROWN
Turn the crown in a clockwise or anti-clockwise direction until you reach your desired time.

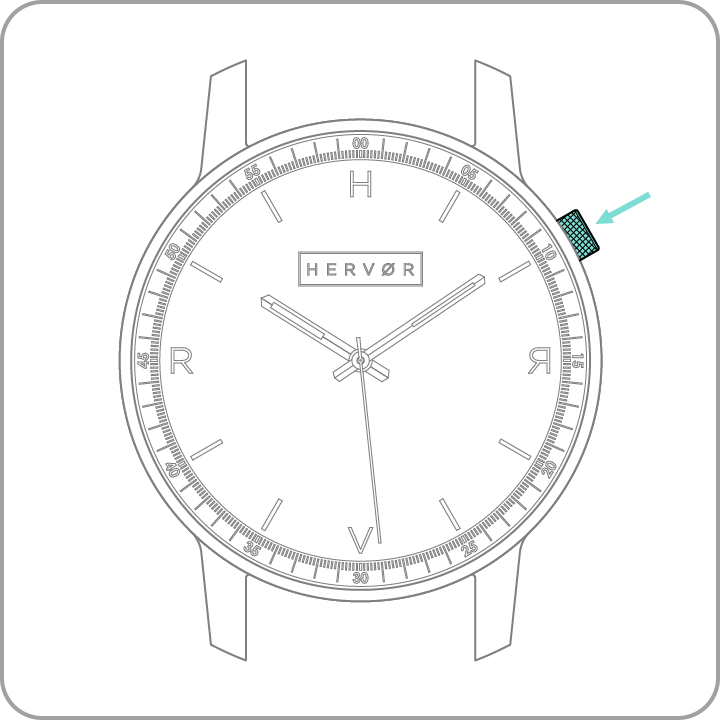
3. PRESS CROWN IN
Press the crown towards the watch casing until you experience a click.
The time on the watch should be ticking at your desired time.
IMPORTANT: Ensure the crown is pressed fully into position to guarantee water resistance seal.